Today I have not one but three tutorials using Little birdie Metallic Wax – Copper Blaze.
This is my DT post for Itsy Bitsy. You can find the post here.
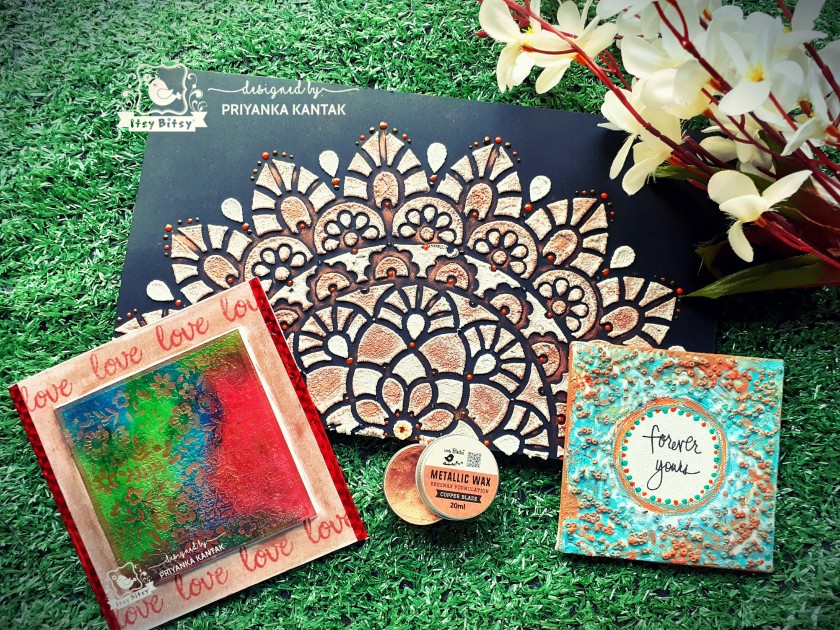
This product is so versatile, you could use it on a variety of mediums and finishes. It gives instant shine to your projects.
Lets get started –
Project I :
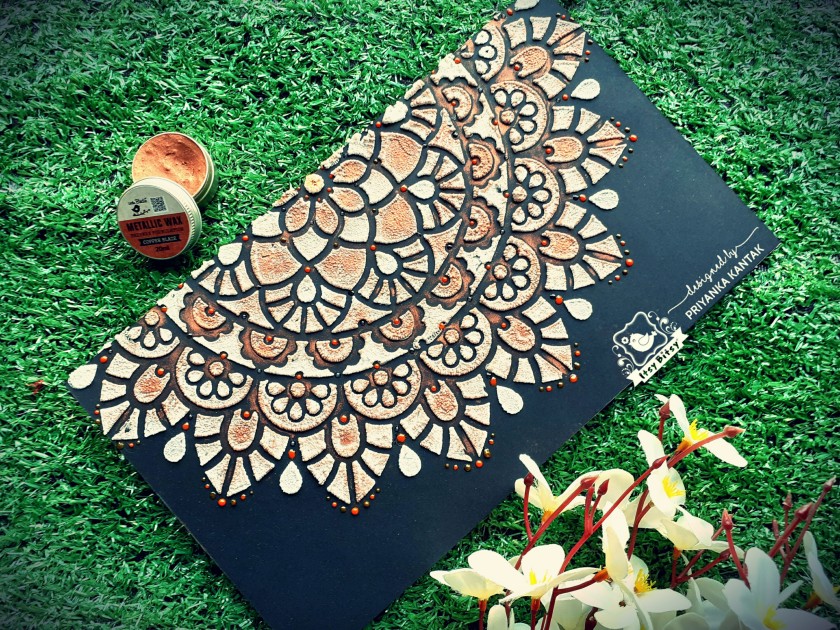
The first project I am showcasing is a home decor project.
Step 1:
I used Little Birdie embossing paste in Frosty Fizz with Little Birdie 14×14 inch stencil Classy Lace on black cardstock. The cardstock measured 7″ × 12″.
I used only half of the stencil.
* Spreading the paste evenly with a spatula is the key*

Step 2:
It looks like this.

With the help of a heat gun, I got this texture of the paste like below.
Isn’t it gorgeous?

Step 3 :
Then I used my Star product – Little Birdie Metallic Wax in Copper Blaze. I used my finger to dab the wax on the elevated parts of the design. I purposefully avoided some areas and kept them white. I also let the wax spread a bit on the cardstock too. Its unto you how you want the design to look.


Step 4:
I adhered the cardstock on heavyweight chipboard of the same size.
To further decorate the panel, I used Pearl drops by Little Birdie.
And my project is complete!


Project II :
Now, let’s move on to the second project :

Step 1:
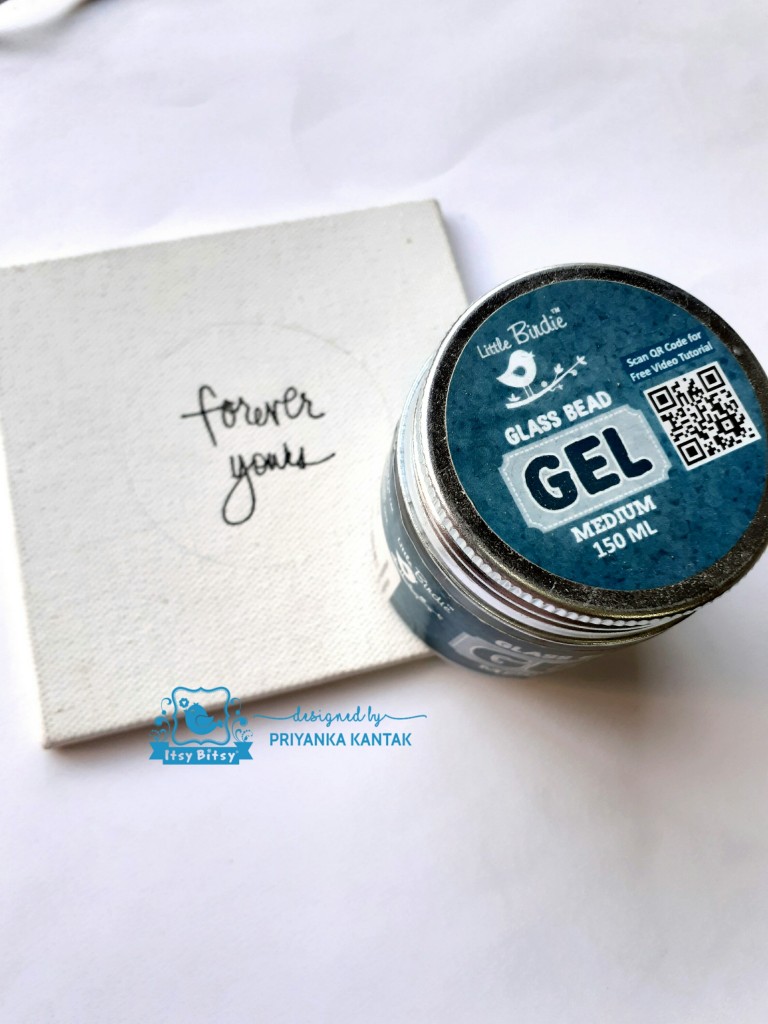
On a square canvas measuring 4″×4″, I stamped the sentiment from the Family stamp set in the middle.

Step 2:
I then lightly drew a circle around it with the help of a lid. I spread the Glass Bead Gel by Little birdie around the circle with the help of a spatula.
Step 3:
After drying it looks like this :

Step 4:
The next step involves sponging on top of the gel with Little Birdie Chalk paints in Frozen Ice & Sailing Sky.
I also mixed those two to get a darker grey.
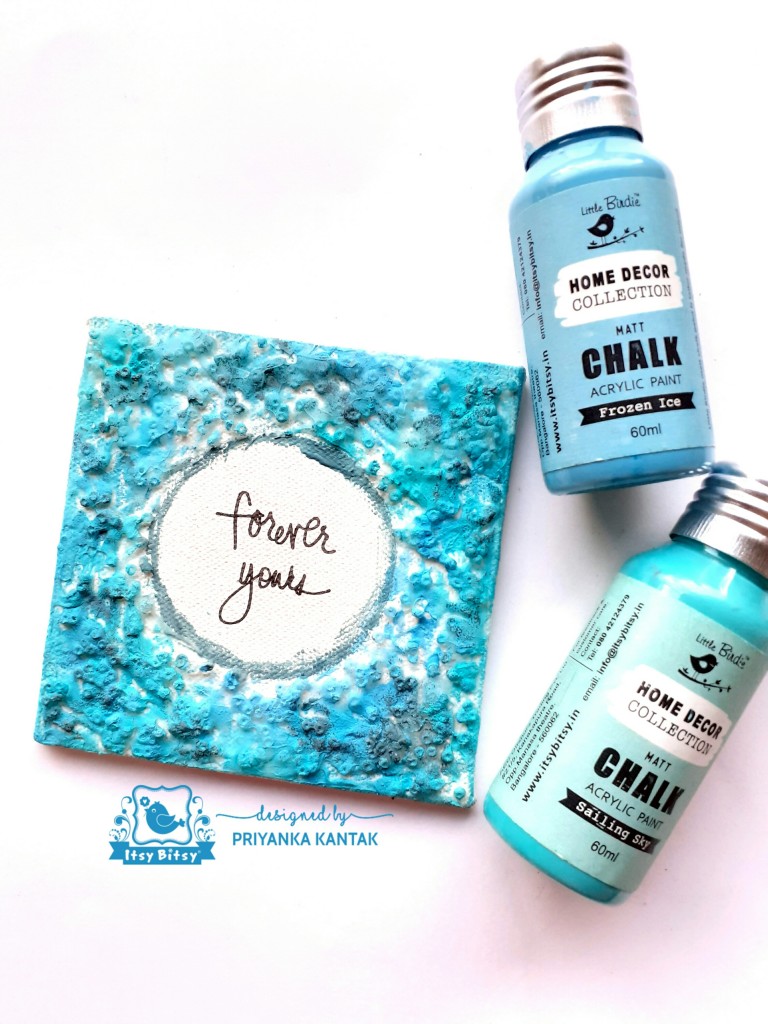
Step 5:
After drying, I spread Little Birdie Metallic Wax in Copper Blaze.
I also outlined the circle with the chalk paints. And used pearl drops around the circle to further enhance the look.
And its complete!

Project III :
Now, lets begin the 3rd tutorial :
You can use this versatile metallic wax in cardmaking too!!!

Step 1:
Taking a 4 × 4 inch Bright White cardstock , I used various distress inks and smooshed them using water.

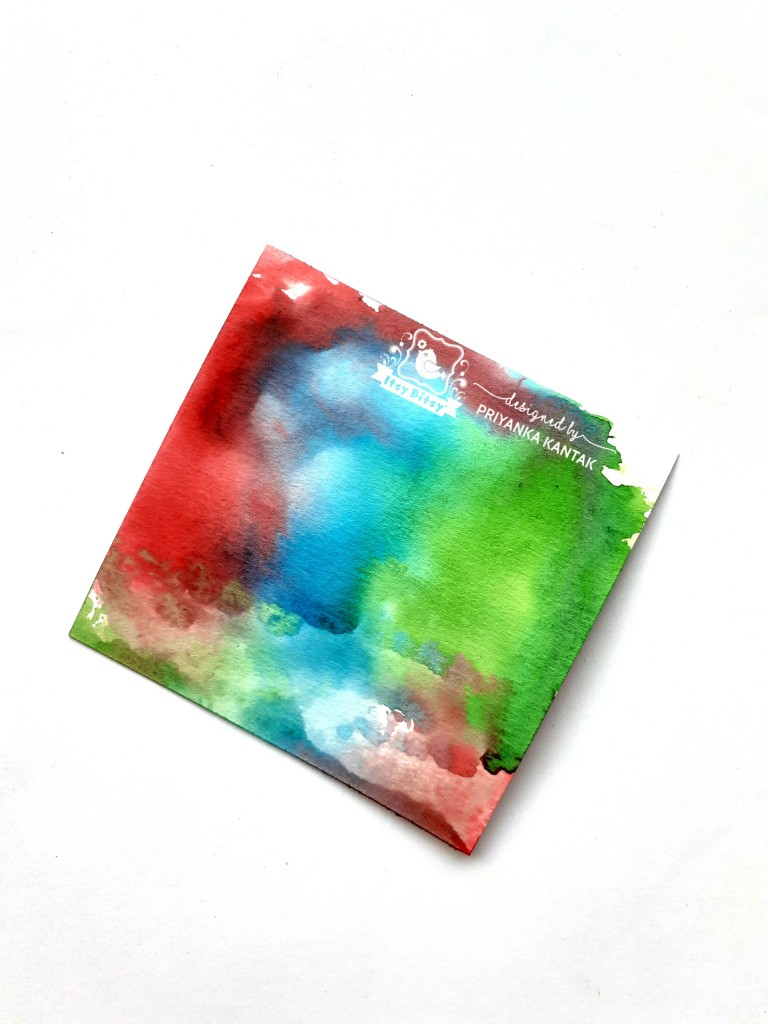
Step 2:
After I was satisfied with the result, I stamped the Flora Wishes stamp by Little Birdie on the panel and heat embossed it with Little Birdie Clear Embossing powder.

Step 3:
I then spread the Metallic Wax Copper Blaze on top of it with my finger. After that I took a tissue and wiped the excess off!

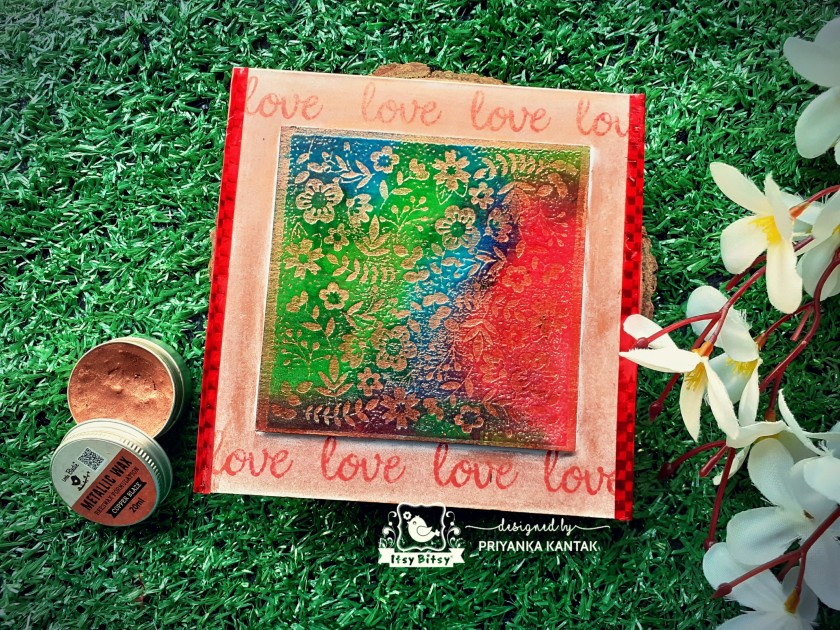
Step 4:
On a base of Classic White cardstock measuring 5.5″ × 11″ , scored at 5.5″, I stamped the sentiment from the same stamp set repeatedly with festive berries distress ink.

I adhered the square panel in the middle. Also, I spread the Metallic Wax Copper Blaze all over the sides. And stuck red shiny tape on two sides.
*To make it transfer proof, I applied a thin layer of Little Birdie Matte Varnish*
And my card is complete.
Hope you liked my projects.
Do let me know your thoughts in the comments.
Have a great day ahead!
Priyanka
